- Published on
Summiting Ha Ling Peak
- Authors

- Name
- Mamun Rashid
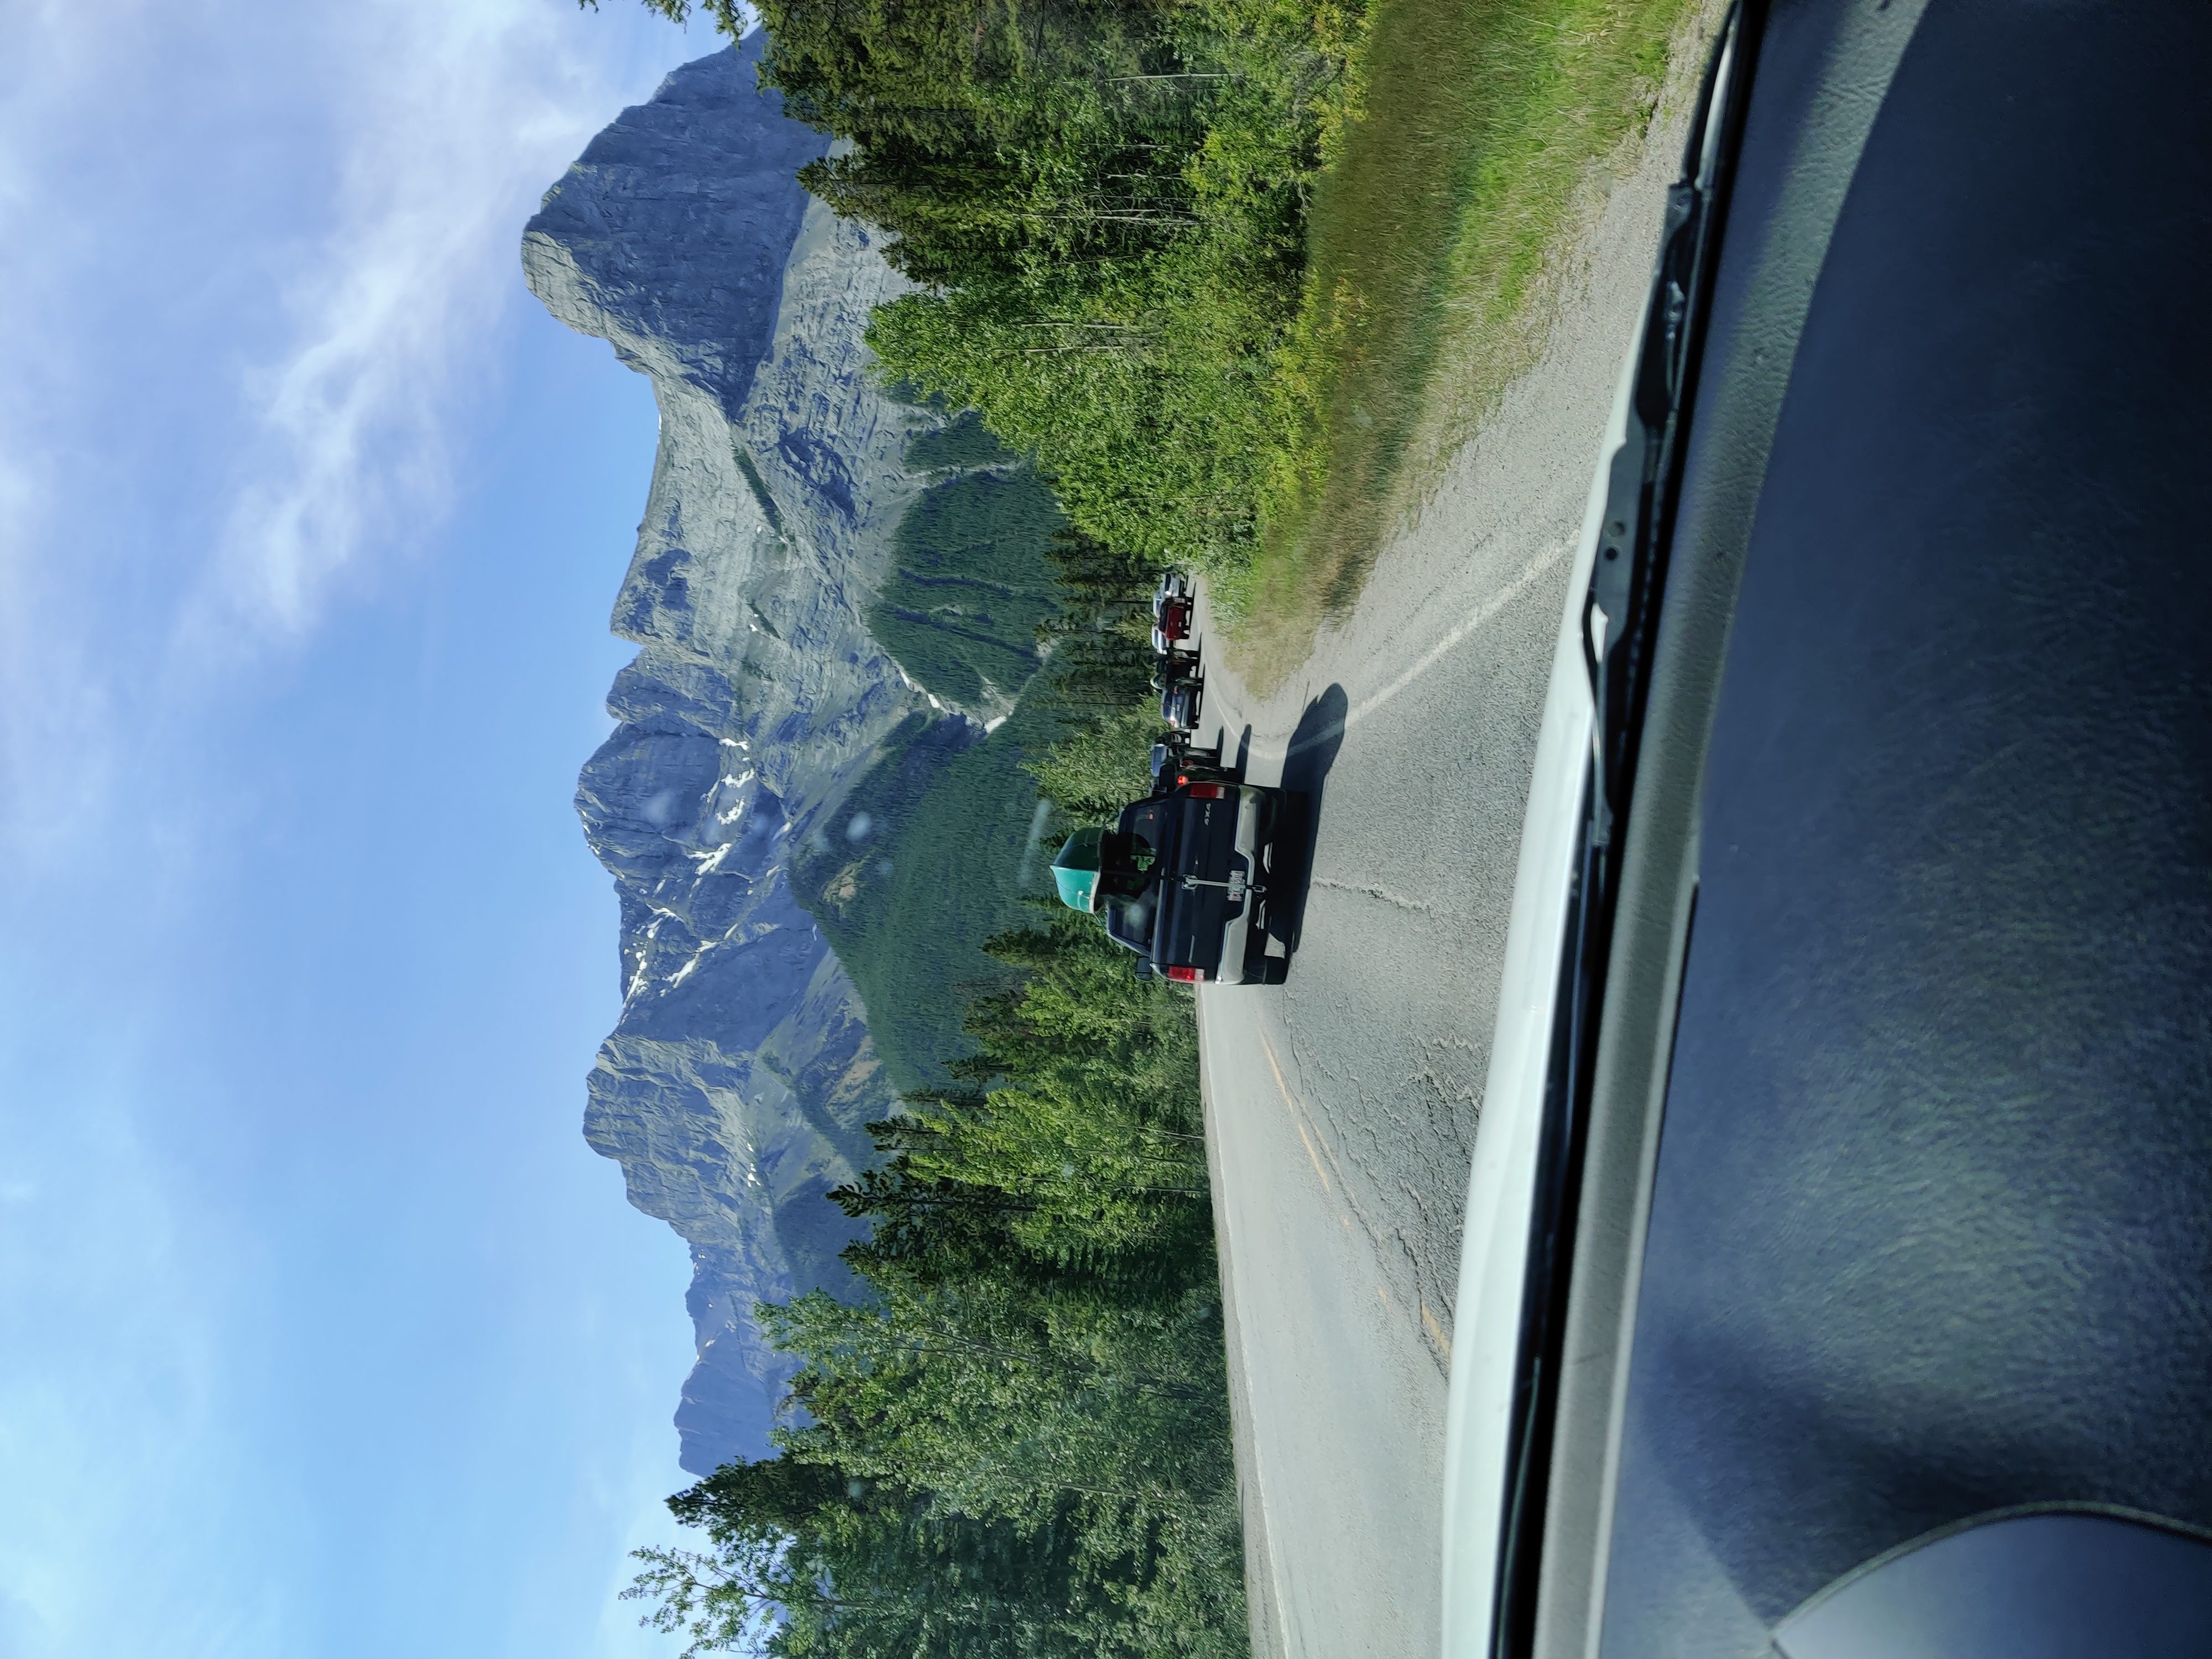
There's a moment when a mountain stops being just a shape on the horizon and becomes a personal challenge. For me, that was Ha Ling Peak on a crisp Canmore morning. It stood there, not just as a landmark, but as an invitation. Locking my car at the Goat Creek trailhead, I felt that familiar mix of excitement and nerves. This wasn't just going to be a hike; it was going to be a conversation between me and the mountain.
The Legend in the Landscape
As I started the climb, I couldn't help but think about the history under my feet. This peak was once called "Chinaman's Peak," a name thankfully retired in 1997. It was renamed to honor Ha Ling, a Chinese cook who, back in 1896, accepted a bet that he couldn't summit the peak and return in under 10 hours. He did it, planting a flag at the top and etching his name into local legend. Hiking this trail felt like more than just chasing a view; it felt like stepping into a story of resilience and identity.
Getting There: My Pre-Hike Checklist
For anyone looking to follow in my footsteps, here’s the rundown of how I planned it. It’s pretty straightforward:
- The Drive: I headed up past the Canmore Nordic Centre and took the Smith-Dorrien/Spray Trail (Highway 742) to the Goat Creek Day Use parking lot. It’s a popular spot, so I’d recommend getting there early.
- The Pass: Don't forget your Kananaskis Conservation Pass. You need it for parking anywhere in the area. I bought mine online beforehand to save time.
- The Numbers: My GPS clocked the round trip at about 7.8 km with around 810 meters of elevation gain. It’s a solid workout.
- My Timing: It took me about 4 hours total, and that included plenty of stops for photos and just soaking it all in.
- What to Expect: The first 3.5 km are on a beautifully maintained trail, but after the saddle, it gets real. The last 400 meters are a scramble over loose rock. It’s not technical, but you need to be sure-footed.
- Best Time to Go: I went in late summer, which was perfect. If you’re tackling it in the spring or fall, be ready for snow and ice. I saw a few people with microspikes, and they looked like the smartest people on the mountain.
The Climb: Step by Step
1. The Stairmaster Start
The trail doesn't waste any time. Right from the get-go, you're climbing. The switchbacks are relentless, and the path feels like a natural Stairmaster. Thanks to a major trail upgrade a few years back, it's stable and easy to follow, but my legs were definitely burning within the first 20 minutes.
2. The First "Wow" Moment
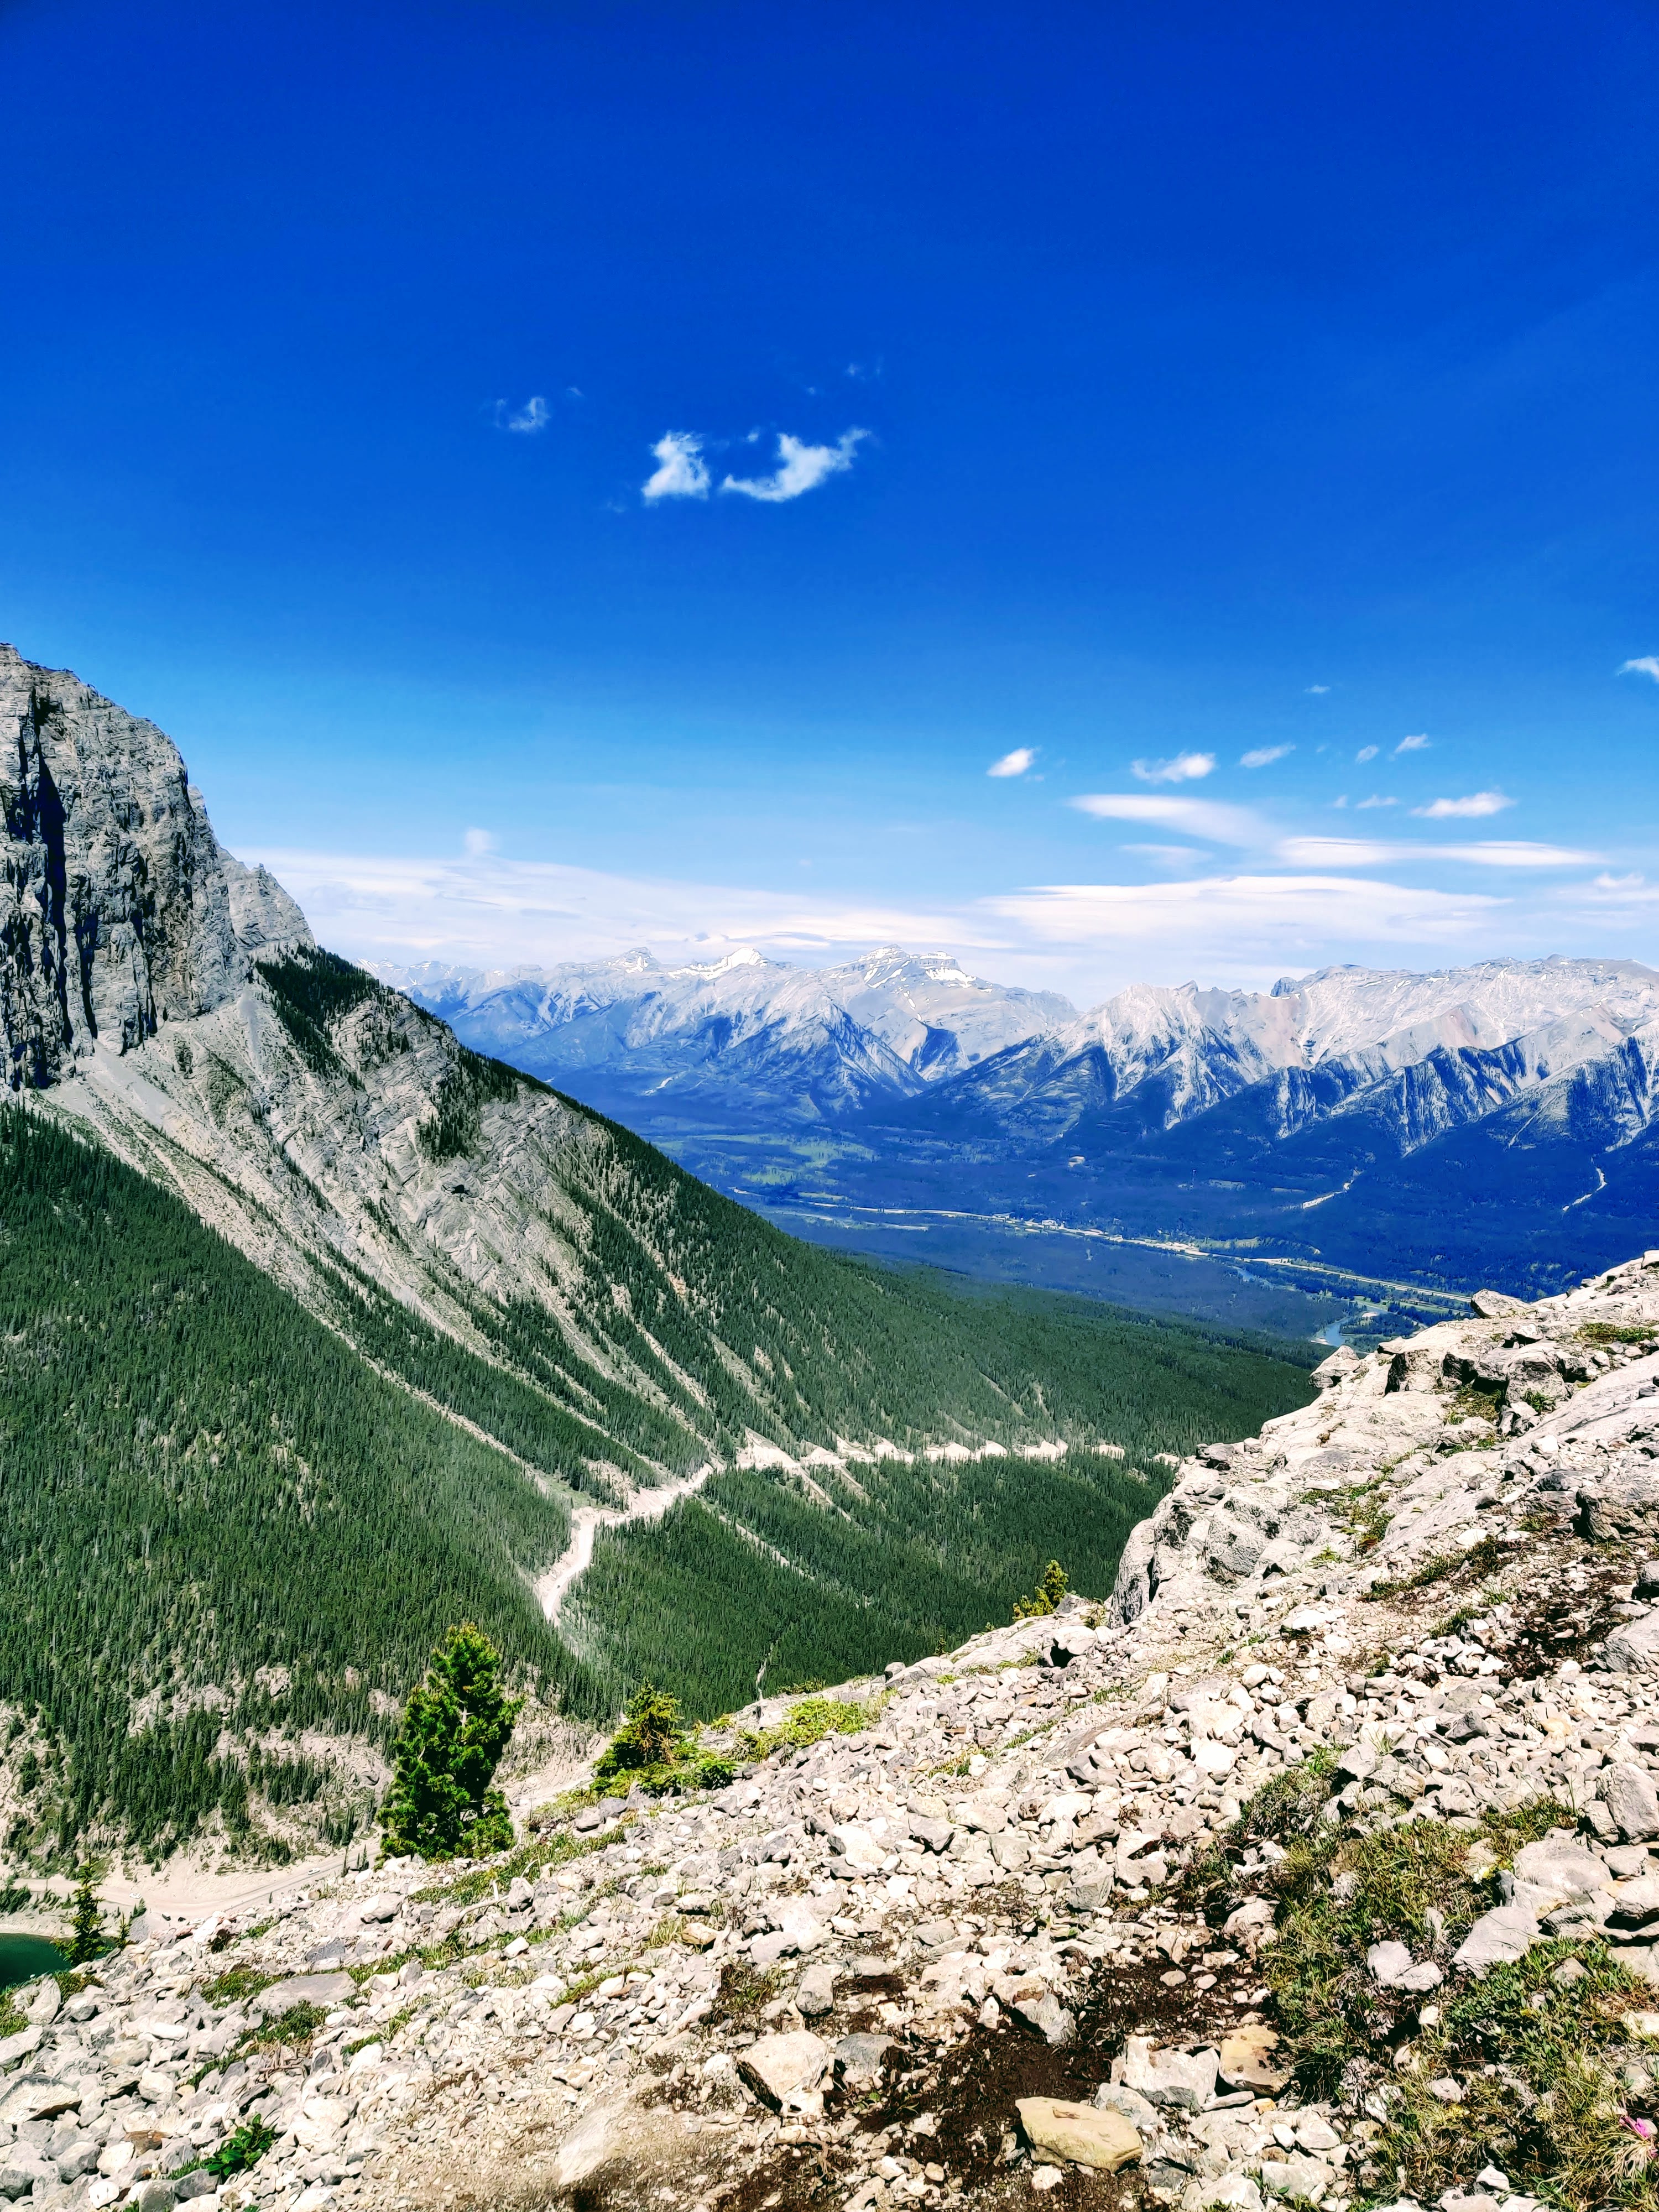
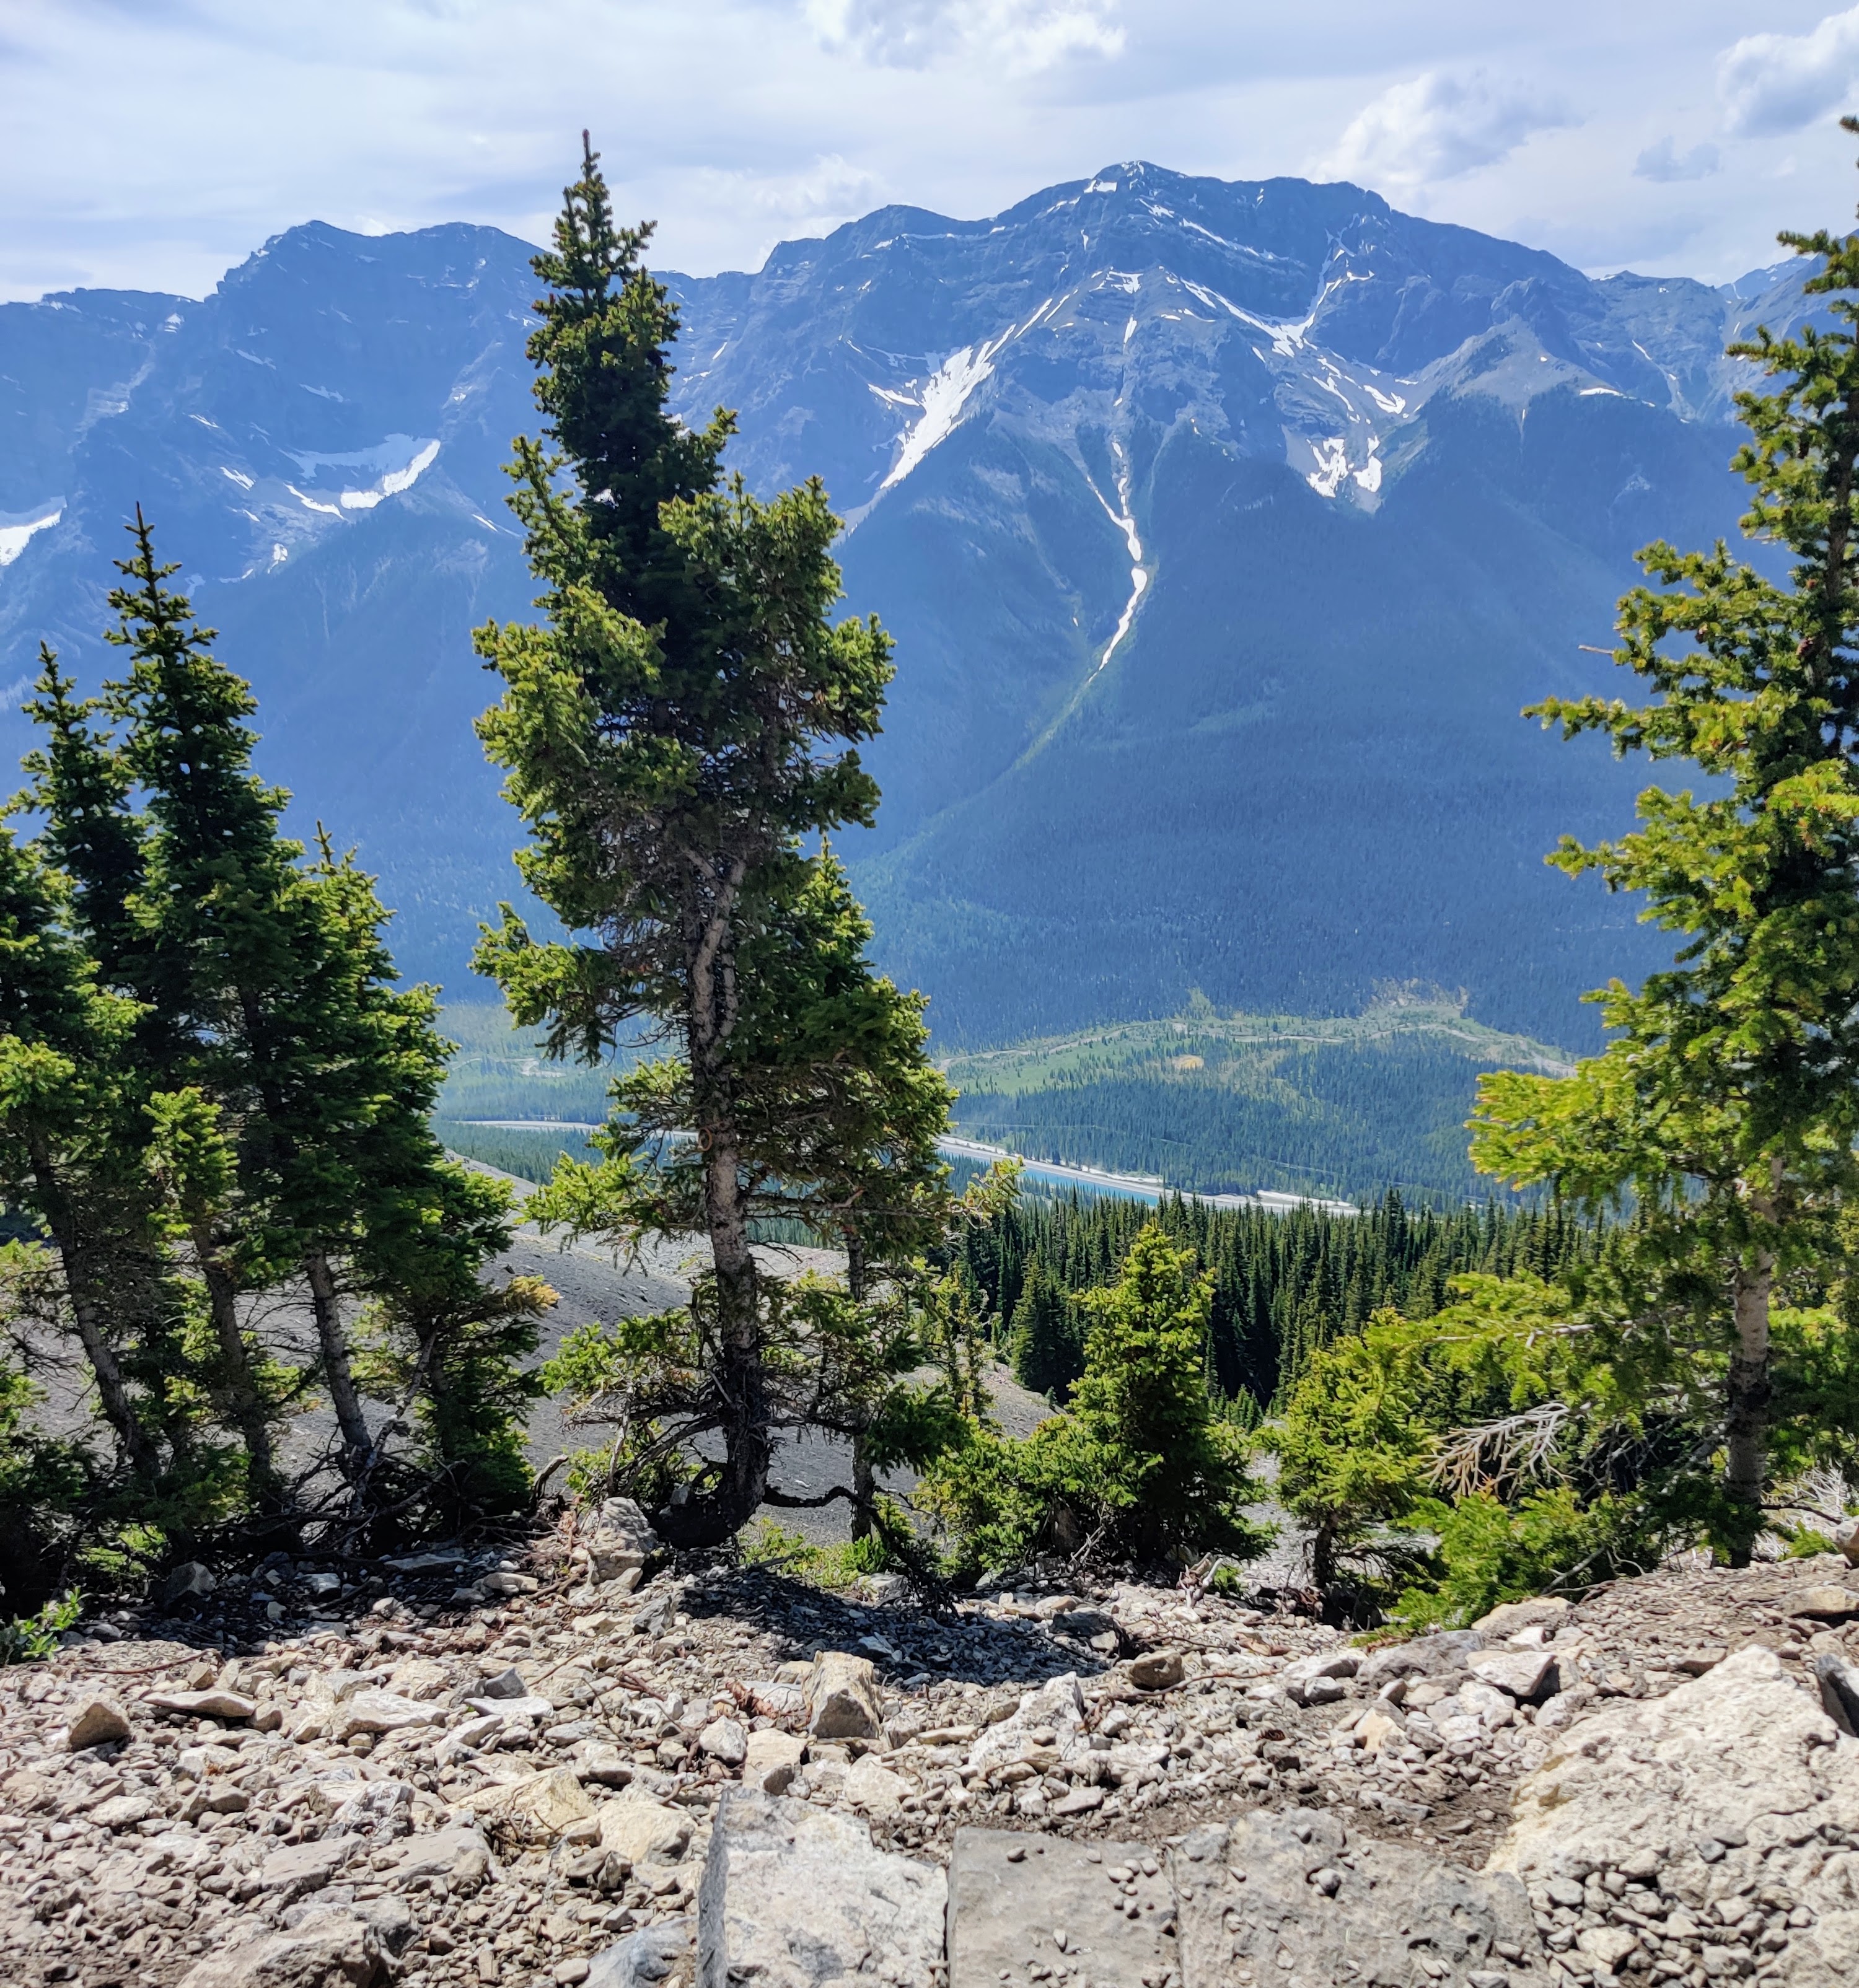
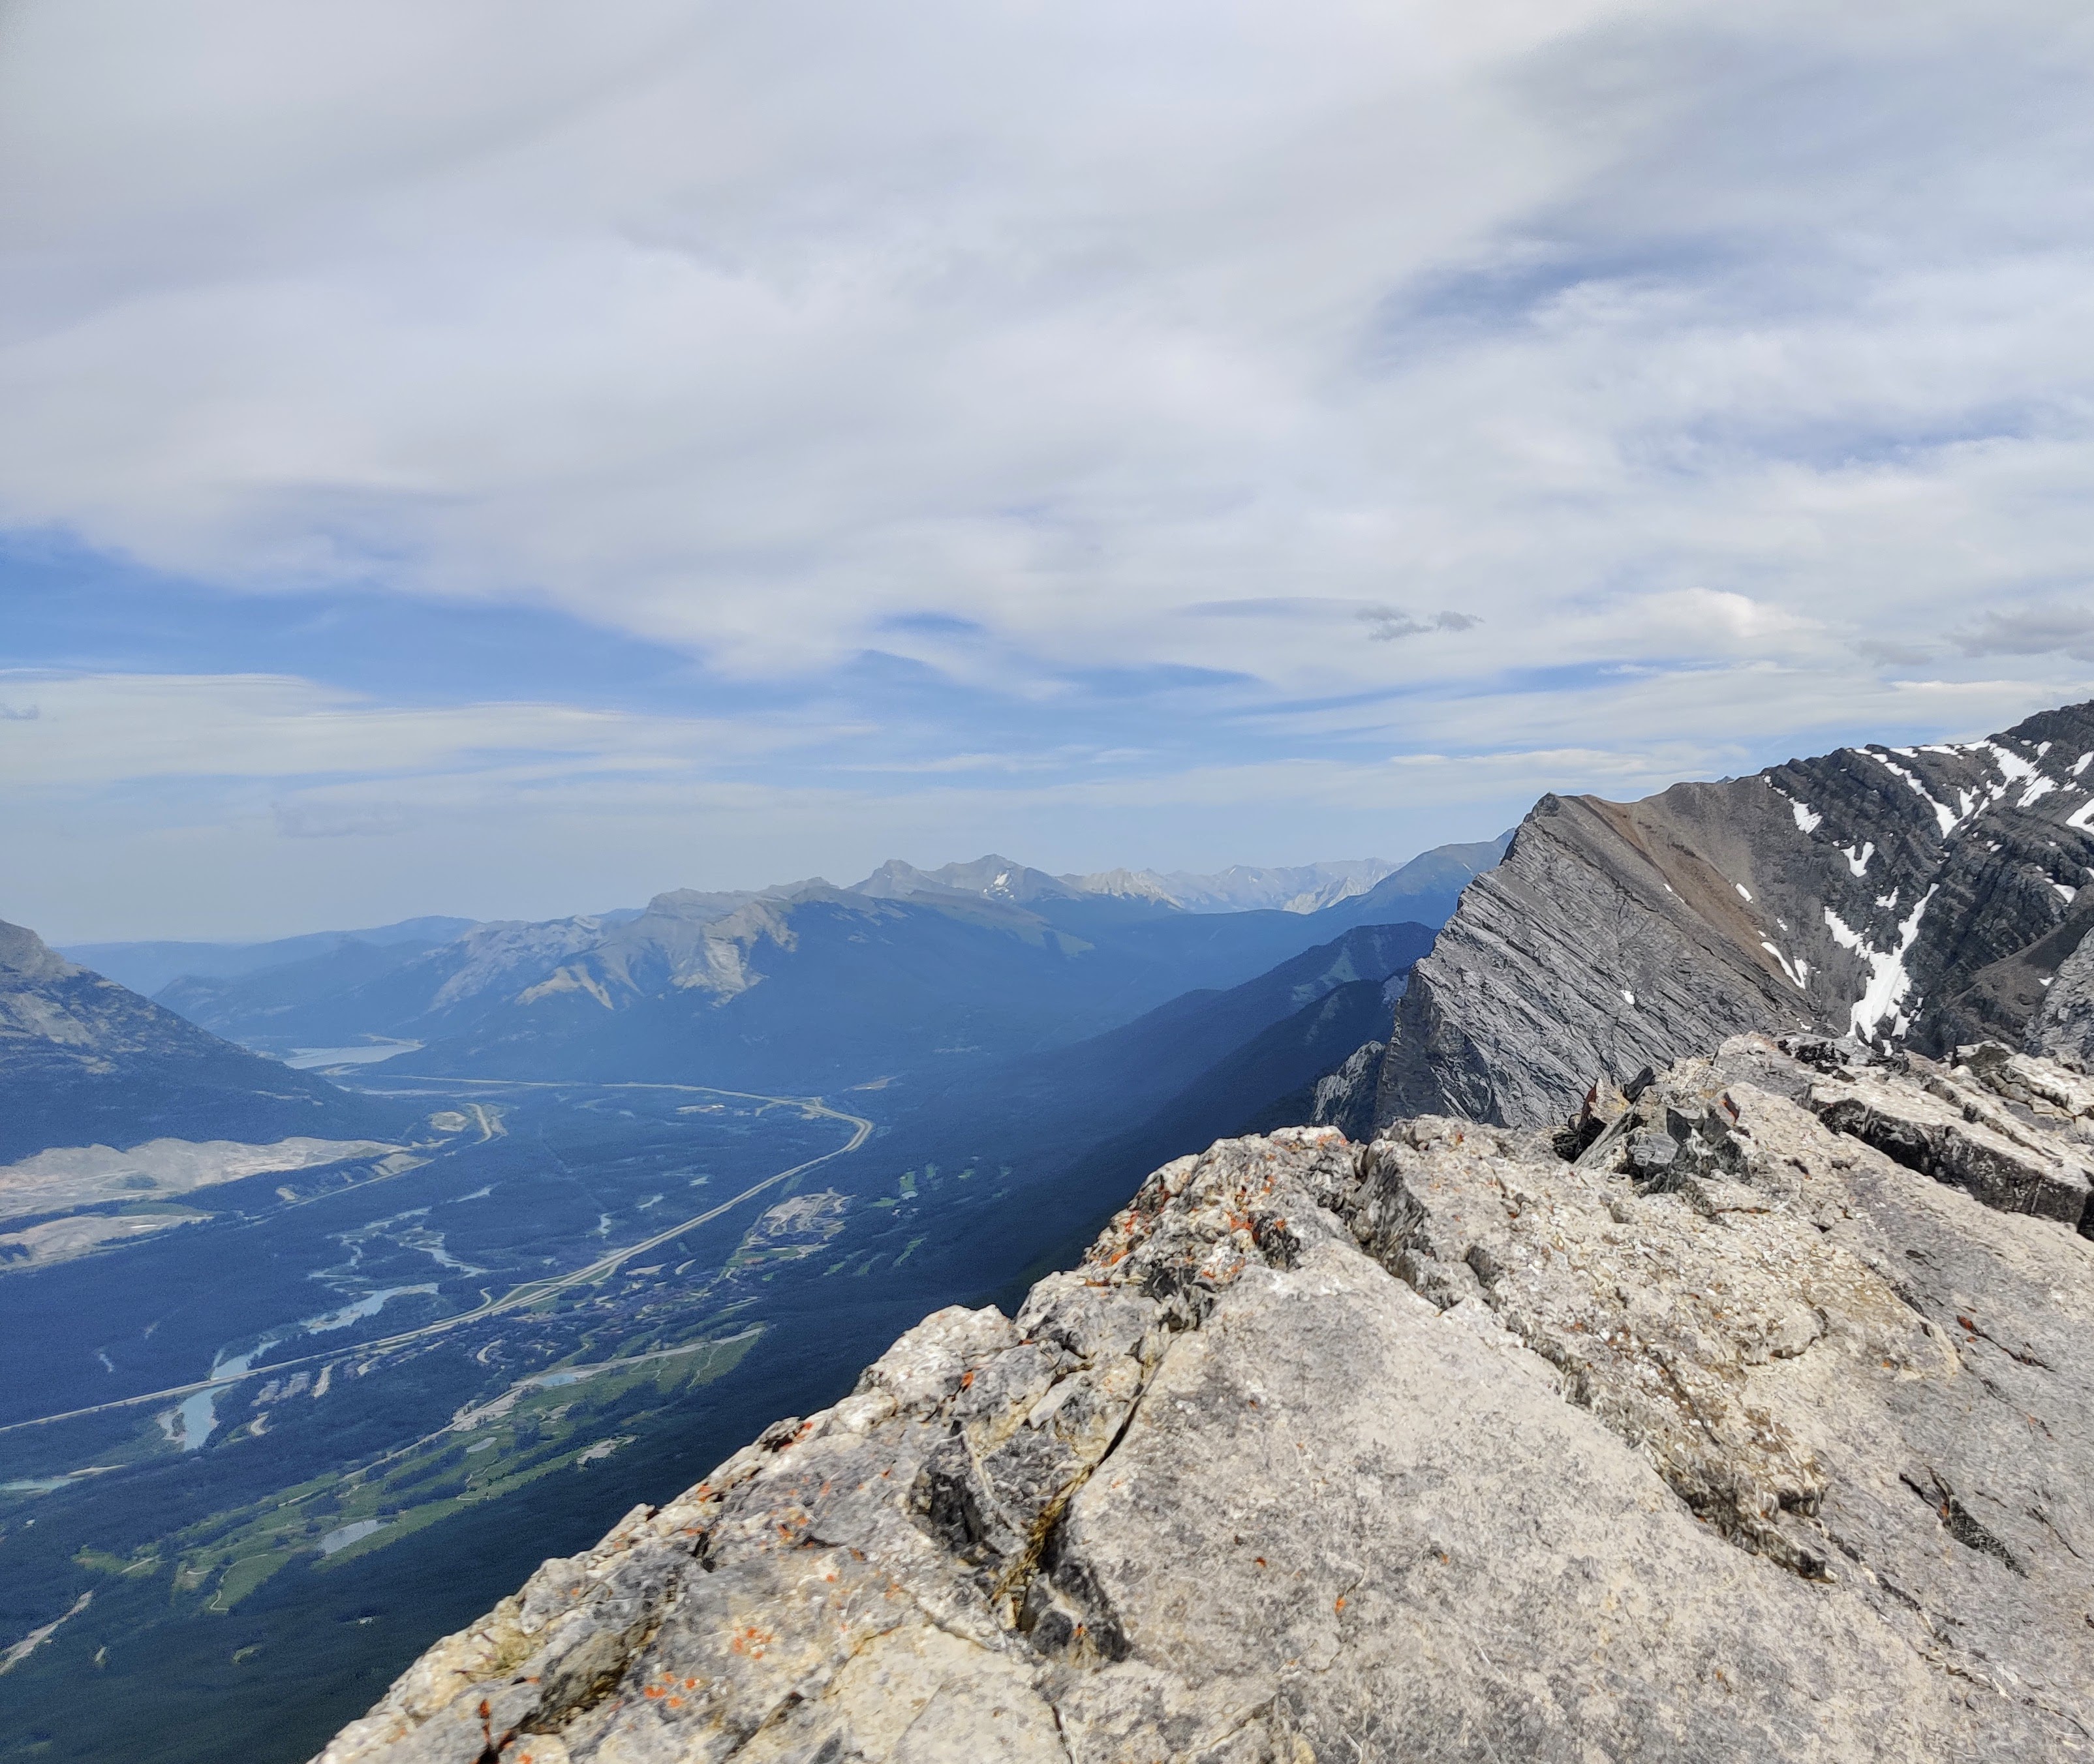
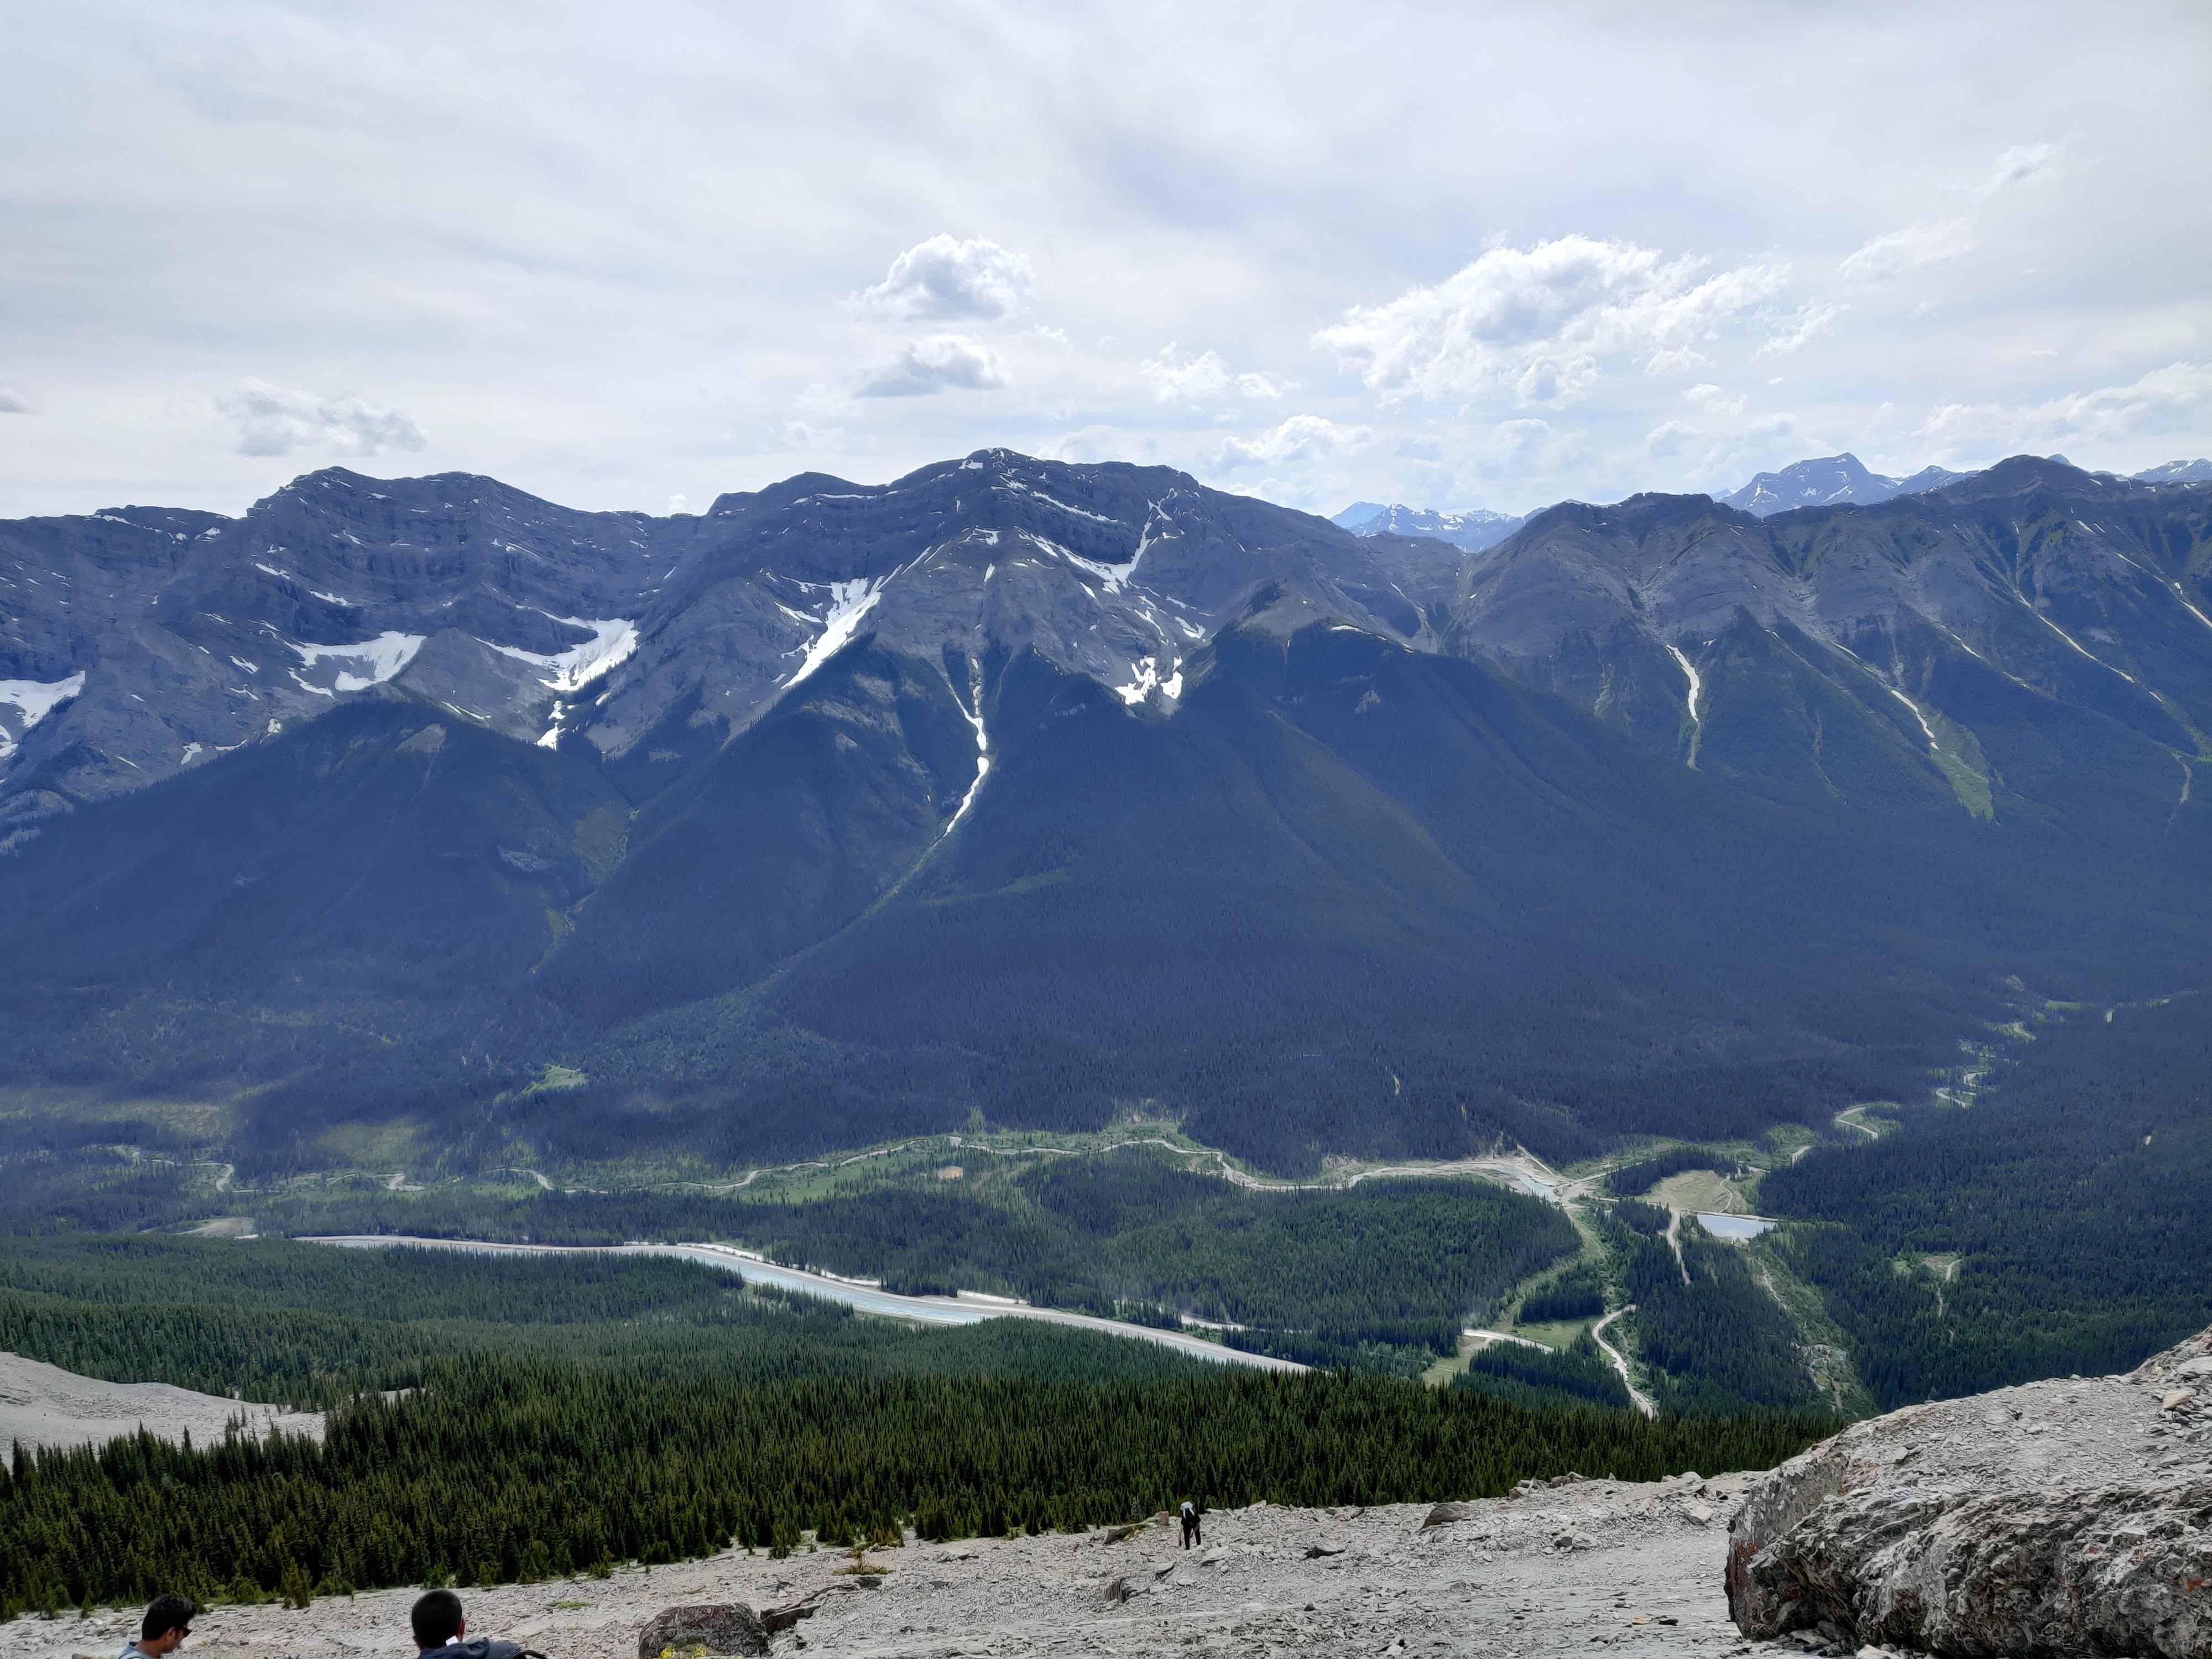
Just when I was starting to wonder if the climb would ever end, I hit the first major viewpoint. And wow. The Bow Valley spread out beneath me, with Mount Rundle looking majestic across the valley. This is the spot where you catch your breath, take a sip of water, and remember exactly why you're doing this. A little further up, another viewpoint offered a dramatic look back at the trail I'd just conquered.
3. The Scramble to the Summit
Reaching the saddle felt like an achievement in itself, but the real fun was just beginning. The maintained trail disappears, and you're left with a steep scramble over scree and rock. I had to watch every step, both to keep my footing and to avoid sending loose rocks down on the hikers below me. This is where the hike turns into a true mountain adventure.
4. That Top-of-the-World Feeling
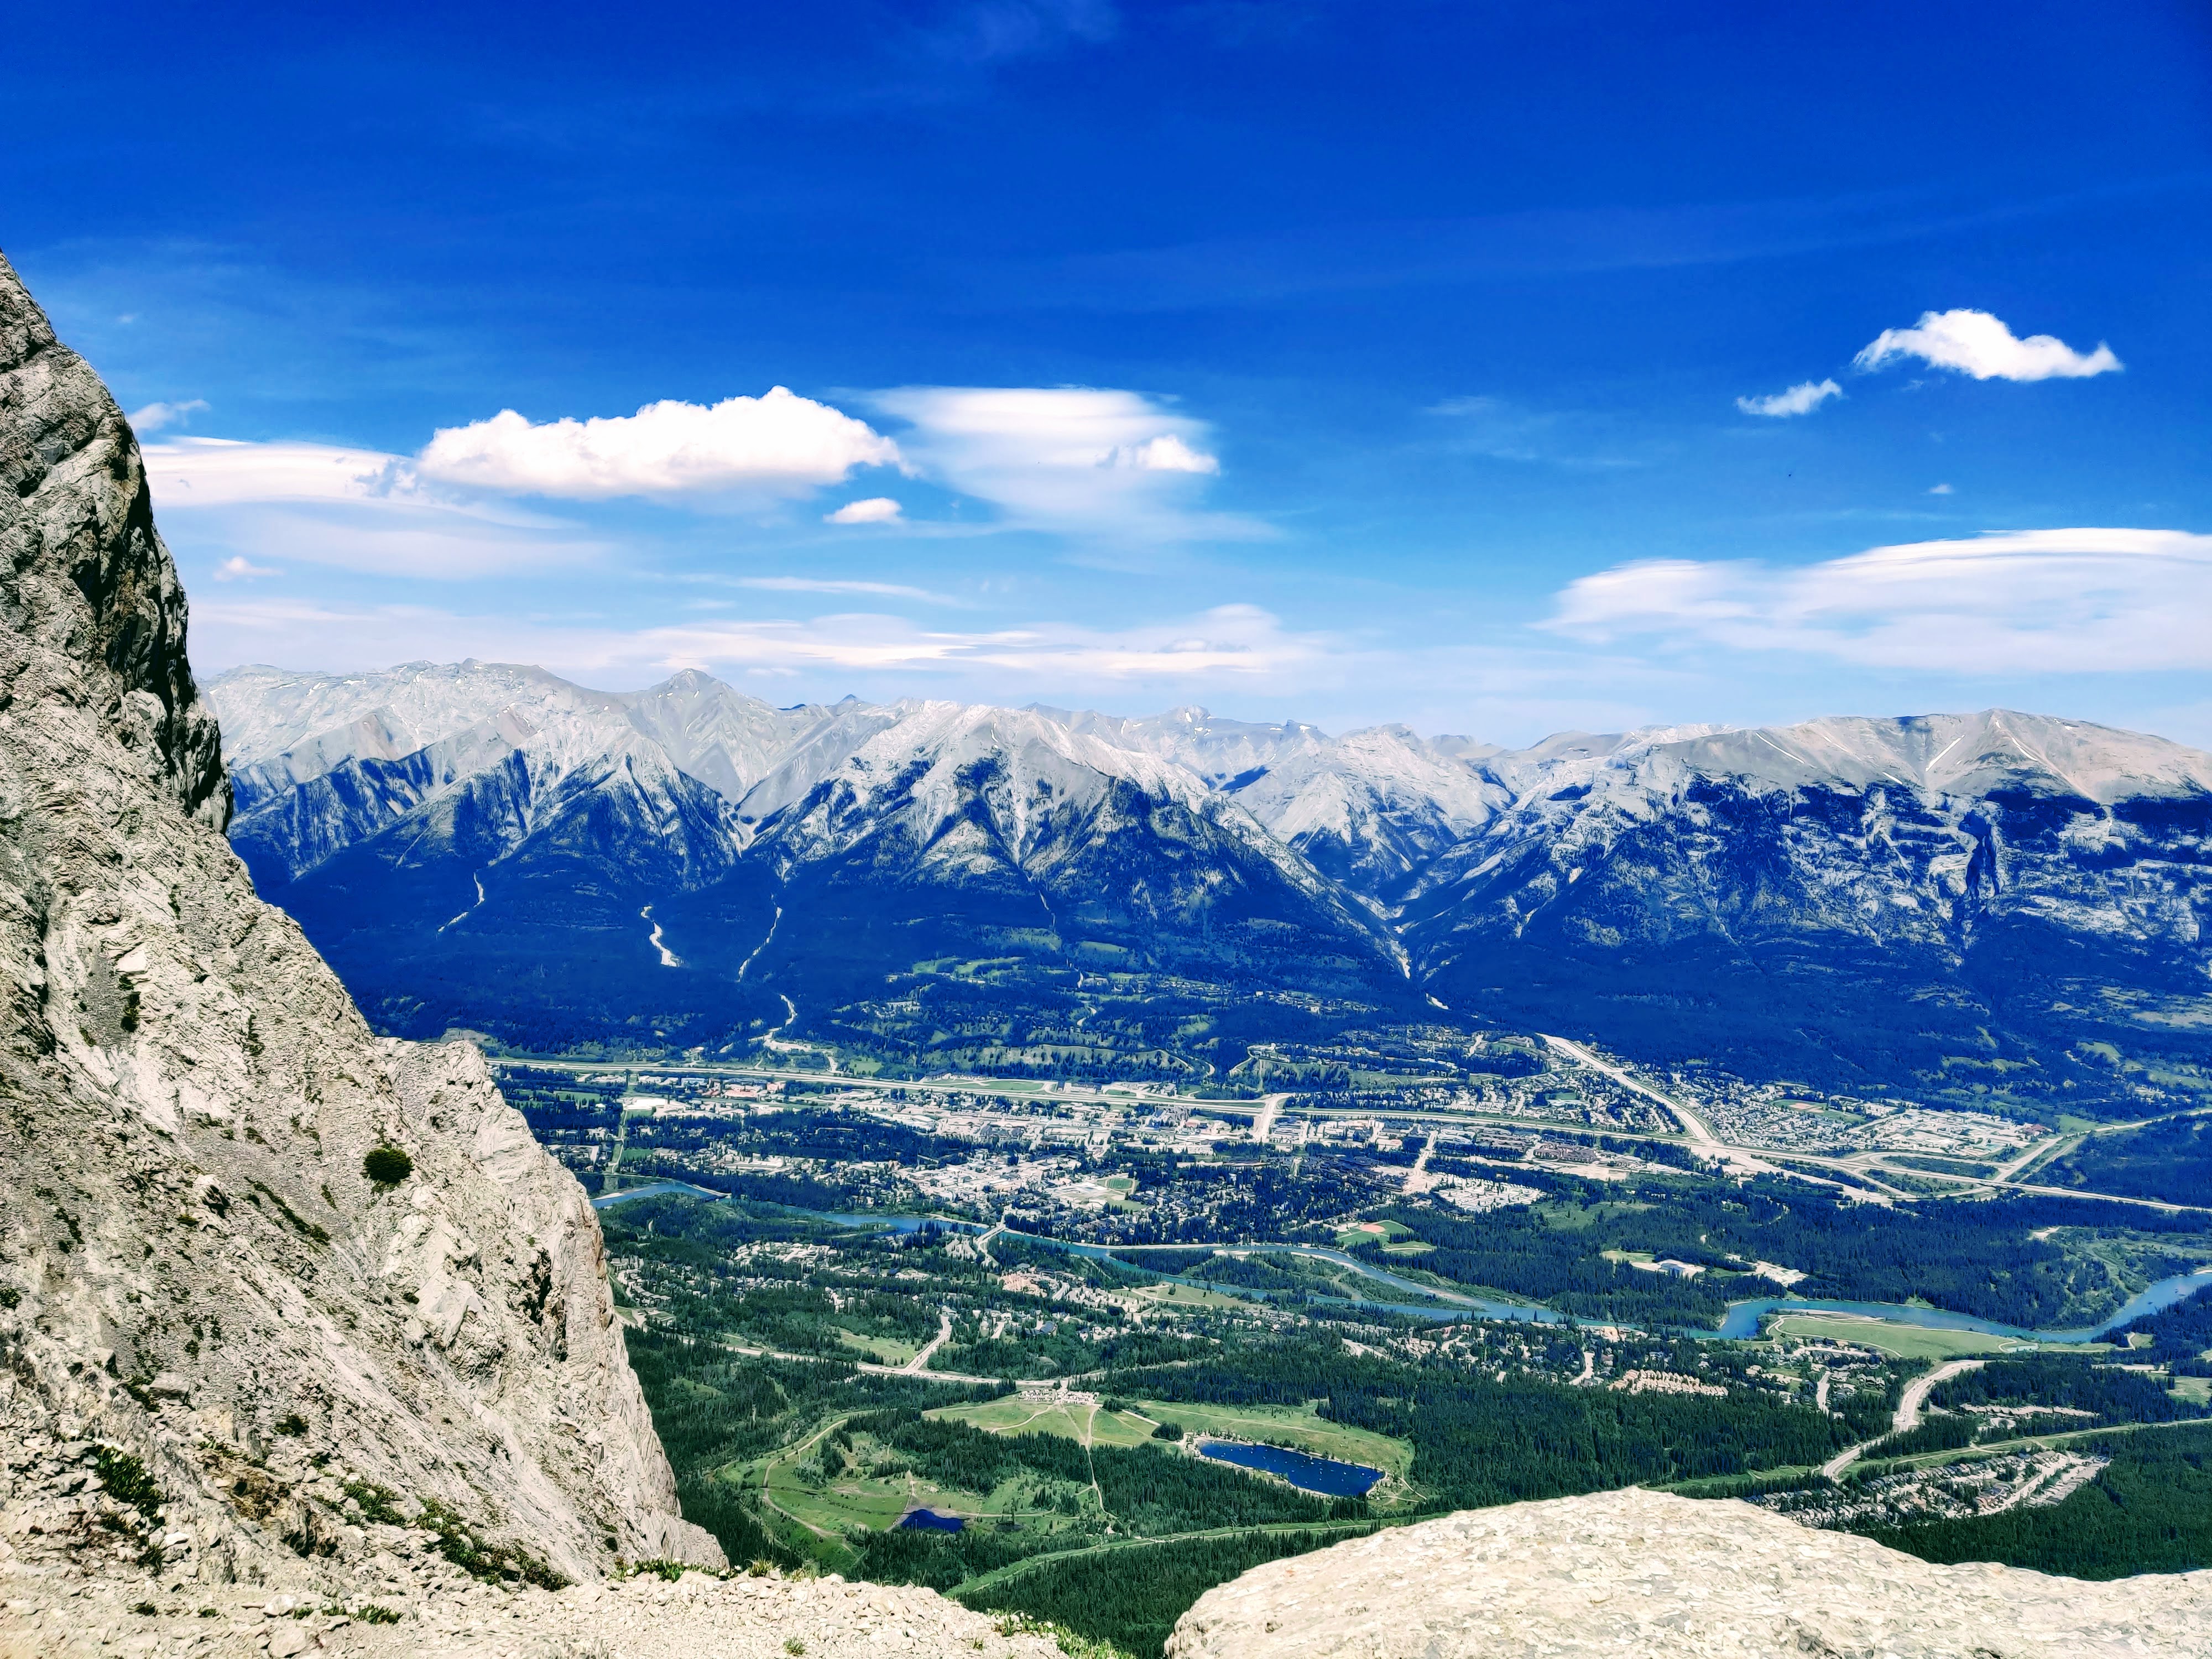
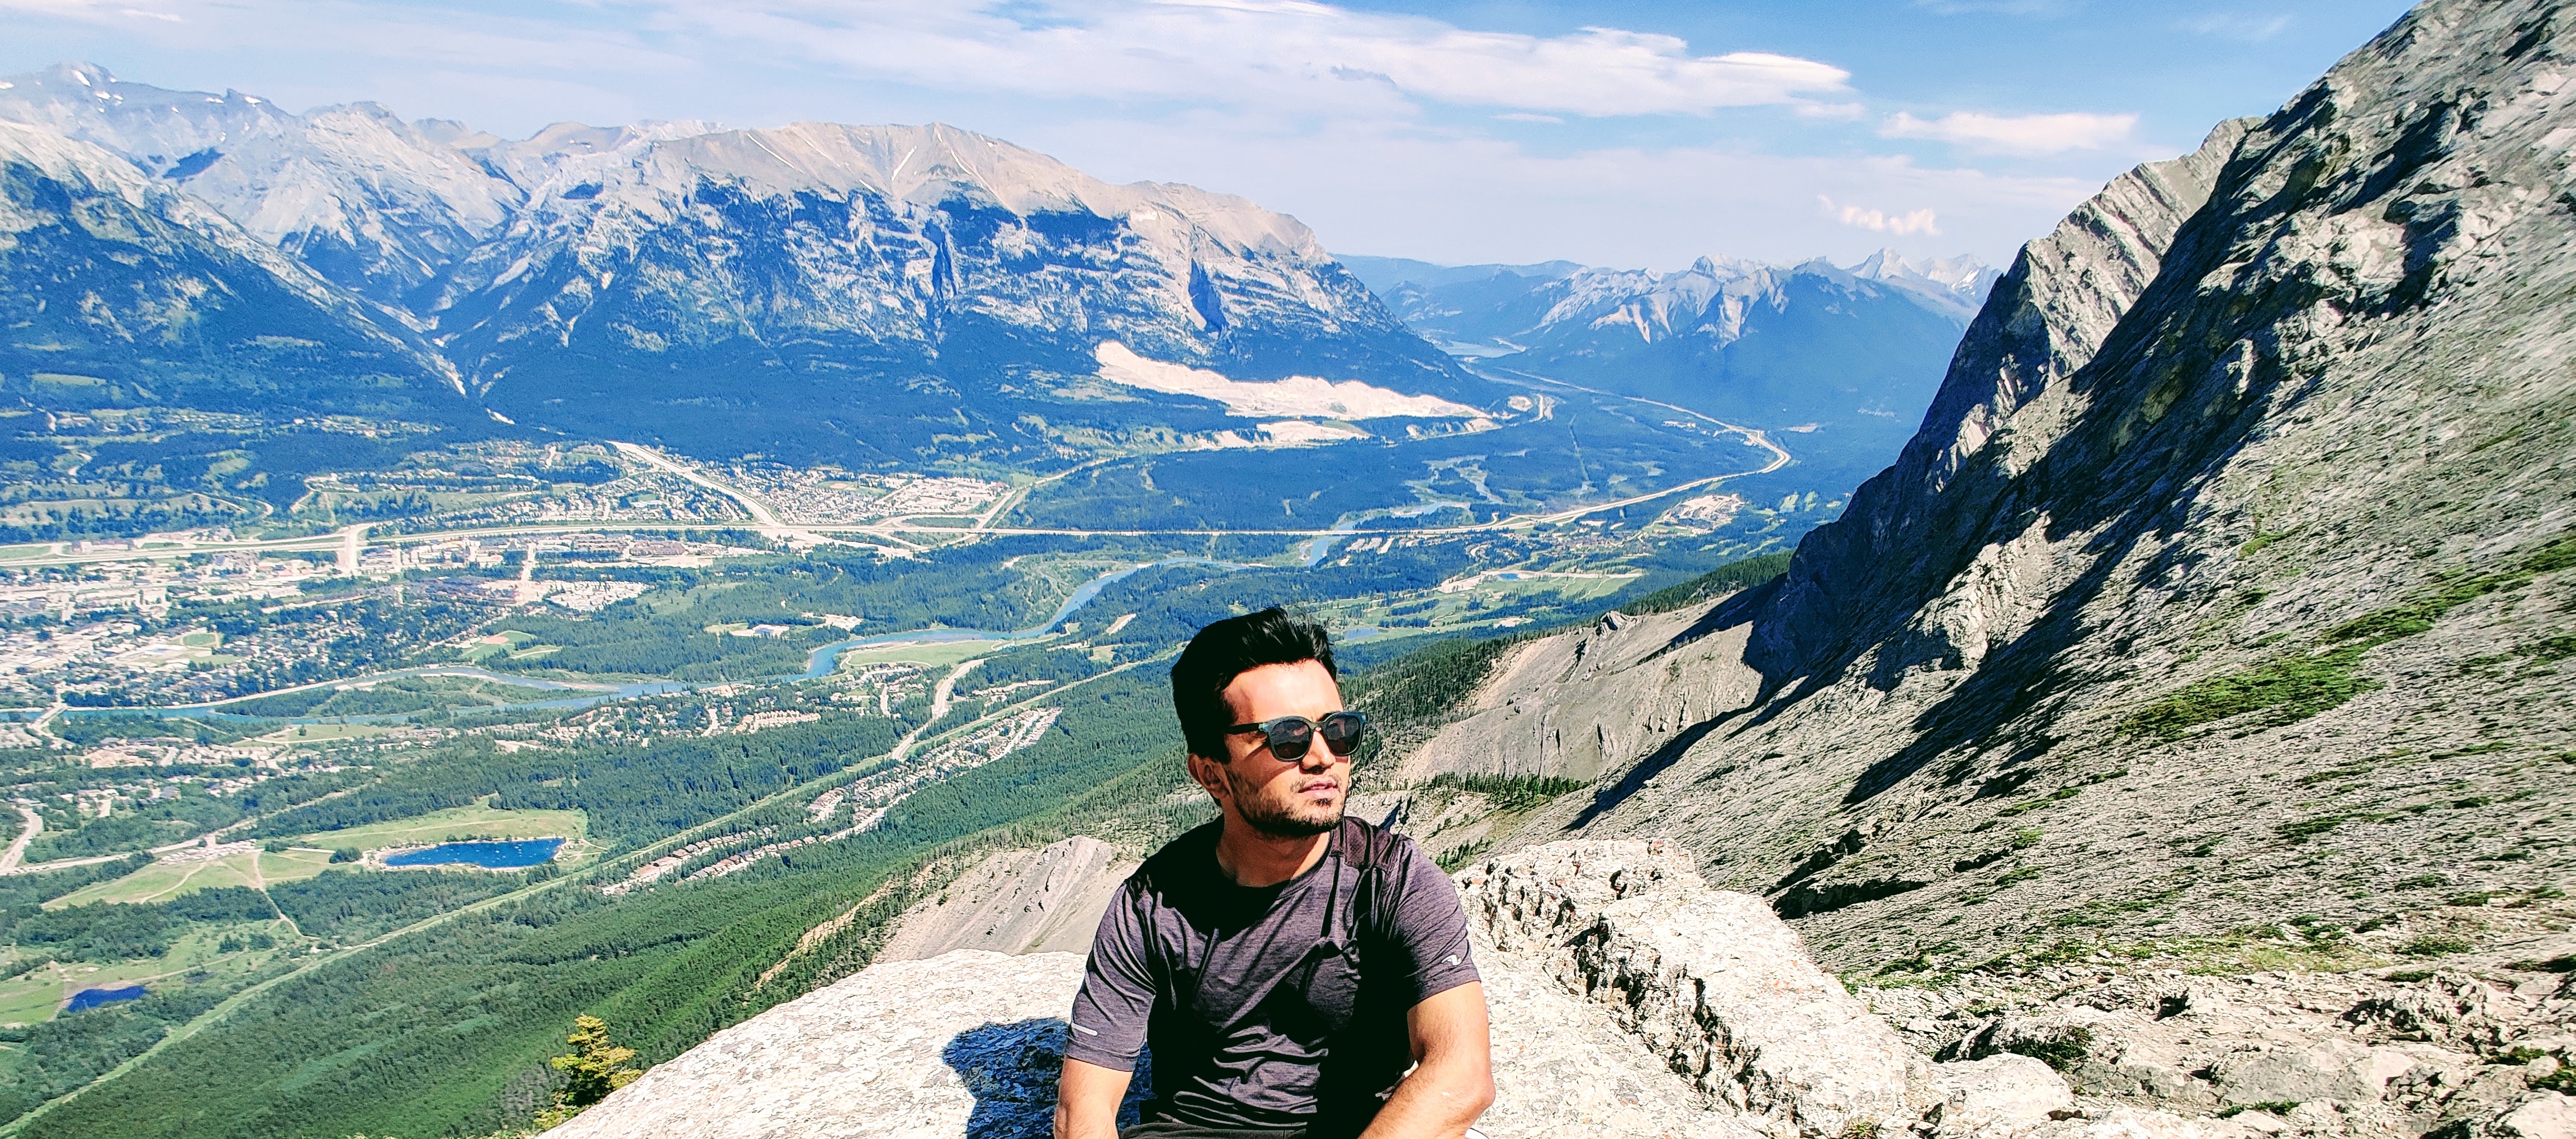
And then, I was there. Standing at 2,408 meters, the world opened up. The 360-degree views of Canmore, the Spray Lakes, and the endless sea of Rocky Mountain peaks were absolutely breathtaking. I found a safe spot on a ledge, pulled out a snack, and just sat there, soaking it all in. There’s a certain kind of quiet up there, a mix of wind and awe that you can’t find anywhere else.

5. The Careful Descent
What goes up must come down, and on scree, that's easier said than done. I took my time on the descent, using my poles for balance and trying not to slide out. My knees were definitely feeling it, but the sense of accomplishment was more than worth it. Getting back to the maintained trail felt like a luxury.
My Two Cents: Tips & Takeaways
- Go Early or Go Late: This trail gets incredibly busy. I started early and had some moments of solitude, but by mid-morning, it was a highway of hikers.
- Gear Up: Good boots are non-negotiable. I was also really glad I brought my trekking poles, especially for the descent. And layers are key—the weather can change in an instant.
- Respect the Mountain: It’s bear country, so make some noise. I had my bear spray handy, just in case. And please, pack out everything you pack in.
- The Vibe: There's a real sense of shared experience on this hike. Everyone is pushing themselves, and there's a lot of encouragement and camaraderie on the trail. When you get to the top, you're sharing that moment with strangers who feel like friends.
Final Thoughts
Ha Ling Peak might not be the tallest or the toughest hike in the Rockies, but it packs a huge punch. It’s a hike that gives back everything you put into it. You get the physical challenge, the incredible views, a touch of history, and that unforgettable feeling of standing on top of the world.
If you're thinking about it, just go. It’s a story waiting to be written.
Enjoyed this post?
Subscribe to get notified about new posts and updates. No spam, unsubscribe anytime.
By subscribing, you agree to our Privacy Policy. You can unsubscribe at any time.
Discussion (0)
This website is still under development. If you encounter any issues, please contact me